Getting Started#
First run#
During the initial run, you will be prompted to configure your observatory.
From command line, run:
astra
Follow the terminal instructions, e.g.:
Welcome to Astra! Please provide the following information:

Use default assets path (/Users/peter/Documents/Astra)? [y/n]: y

Use local Gaia DB? [y/n]: y
Please enter the path to Gaia DB: /Users/peter/gaia_tmass_16_jm_cut.db

Please enter the name of the observatory: ELT

Created config file.
Created folder /Users/peter/Documents/Astra
Created folder /Users/peter/Documents/Astra/observatory_config
Created folder /Users/peter/Documents/Astra/schedules
Created folder /Users/peter/Documents/Astra/logs
Created folder /Users/peter/Documents/Astra/images

Warning: Observatory config files have not been modified from default templates. Please update the following files with your  observatory's information in:

/Users/peter/Documents/Astra/observatory_config
Attention
The configuration files will be created in the observatory_config directory. You must edit them with your observatory’s information before using Astra in normal operation. See: observatory configuration files.
Normal operation#
Once the initial setup is complete, you can run Astra.
Ensure that your ASCOM Alpaca devices or simulators are running on your network and properly configured.
Run the command from command line:
Warning
After initial setup, running this command will park your telescope and close your dome if the weather conditions are unfavorable or your safety monitor indicates an unsafe status.
astra
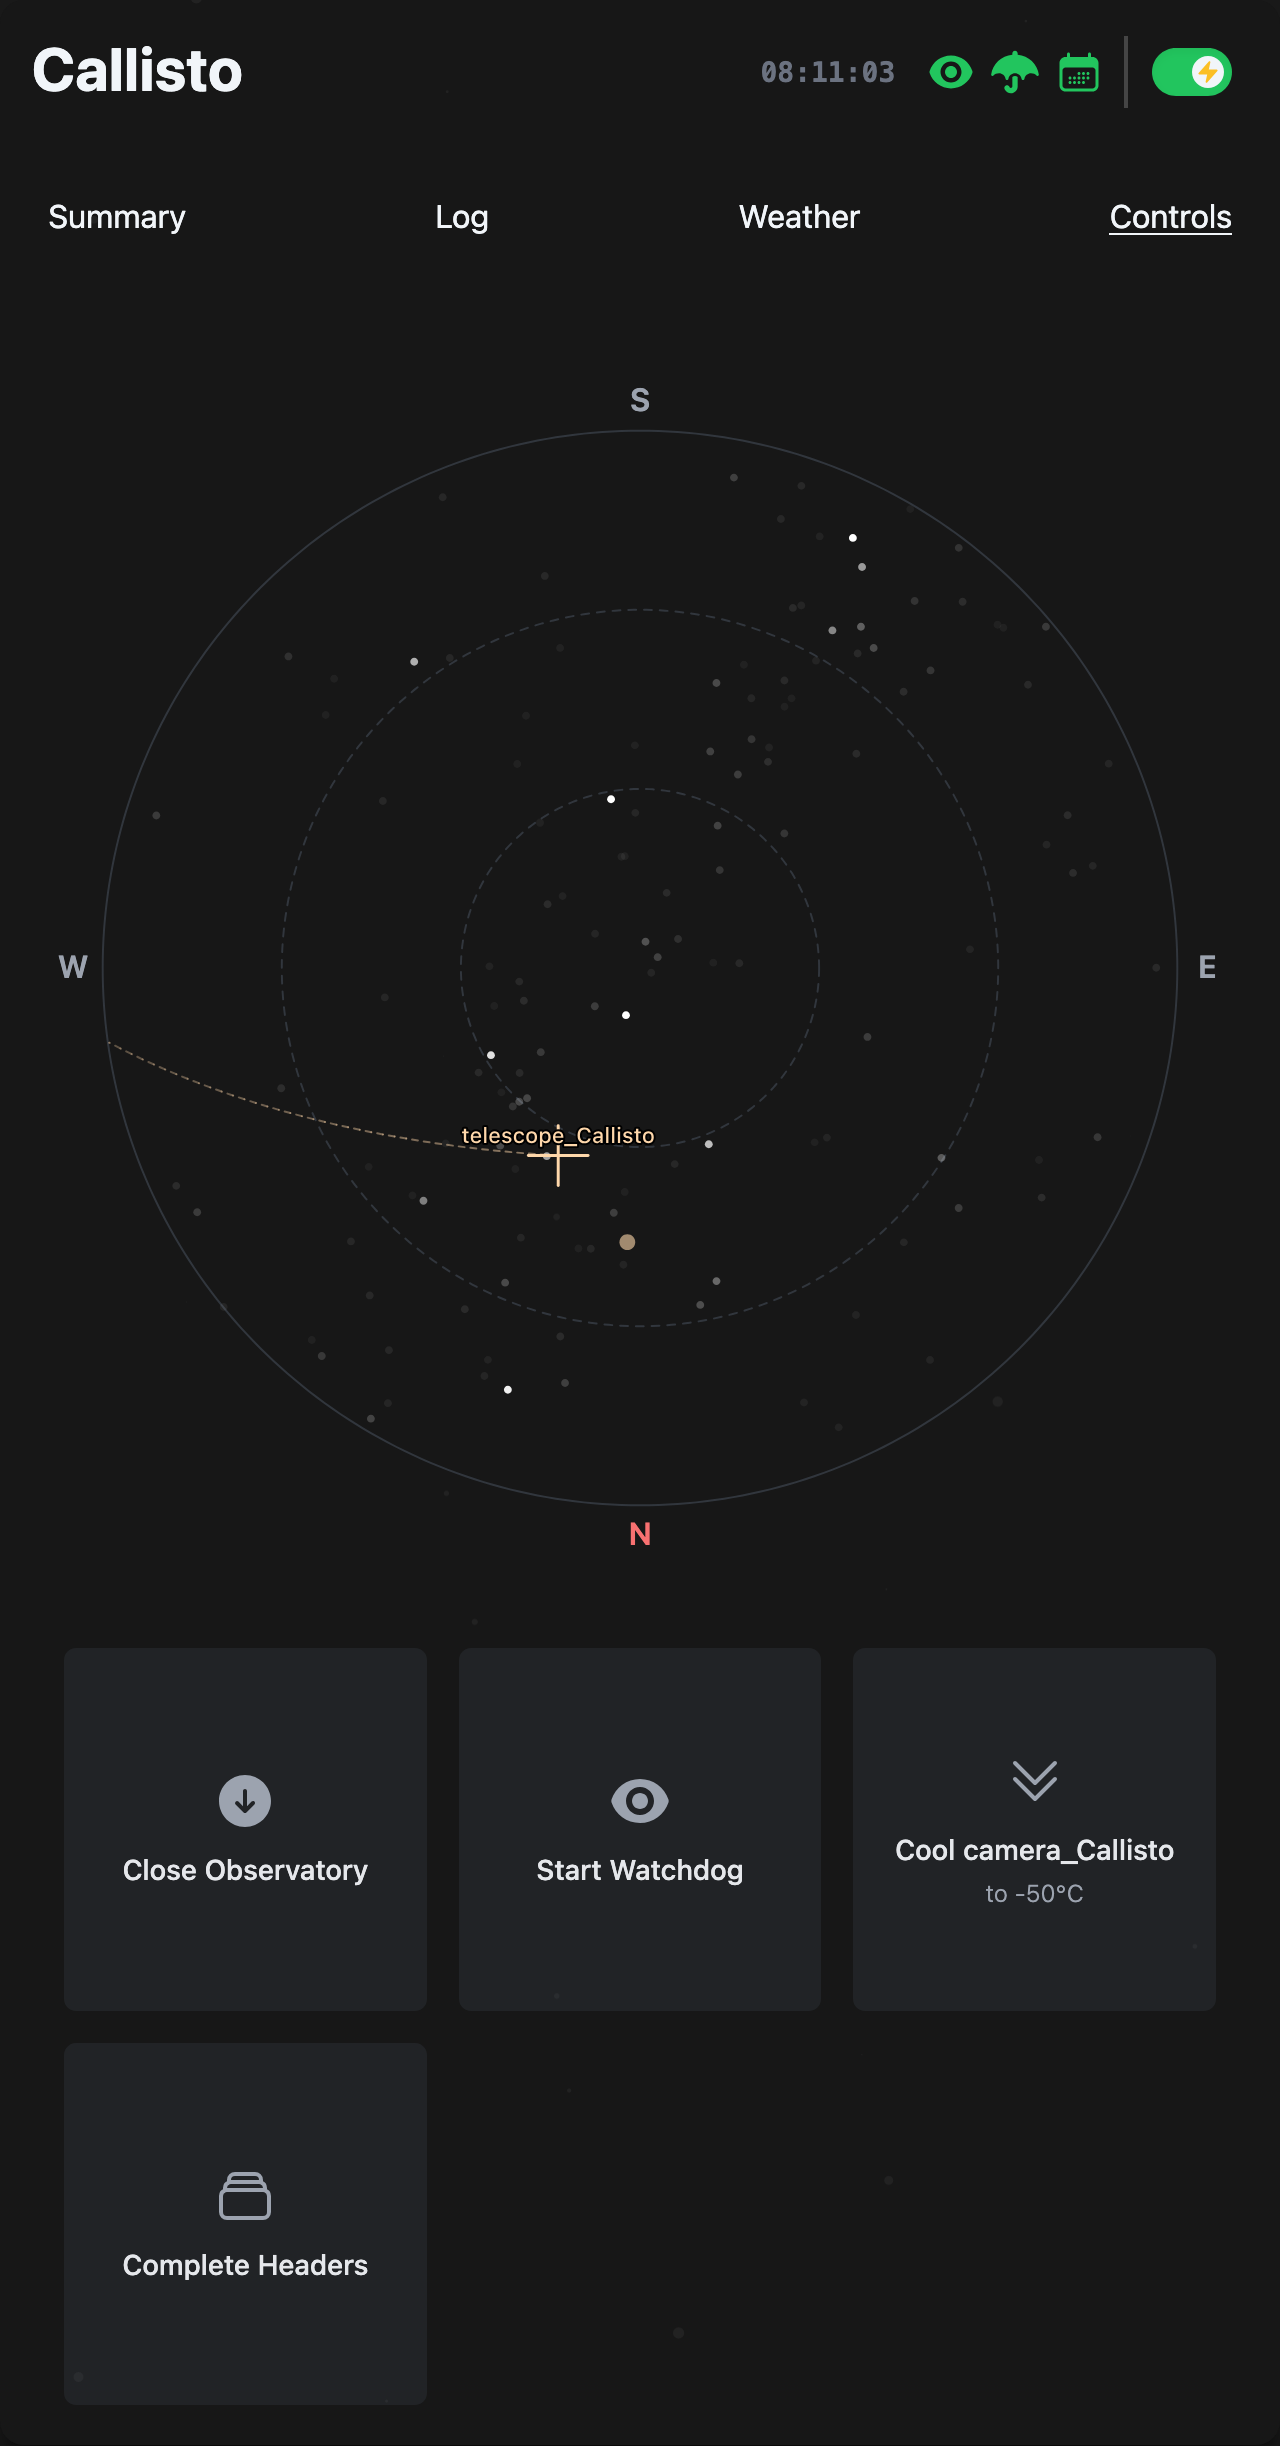
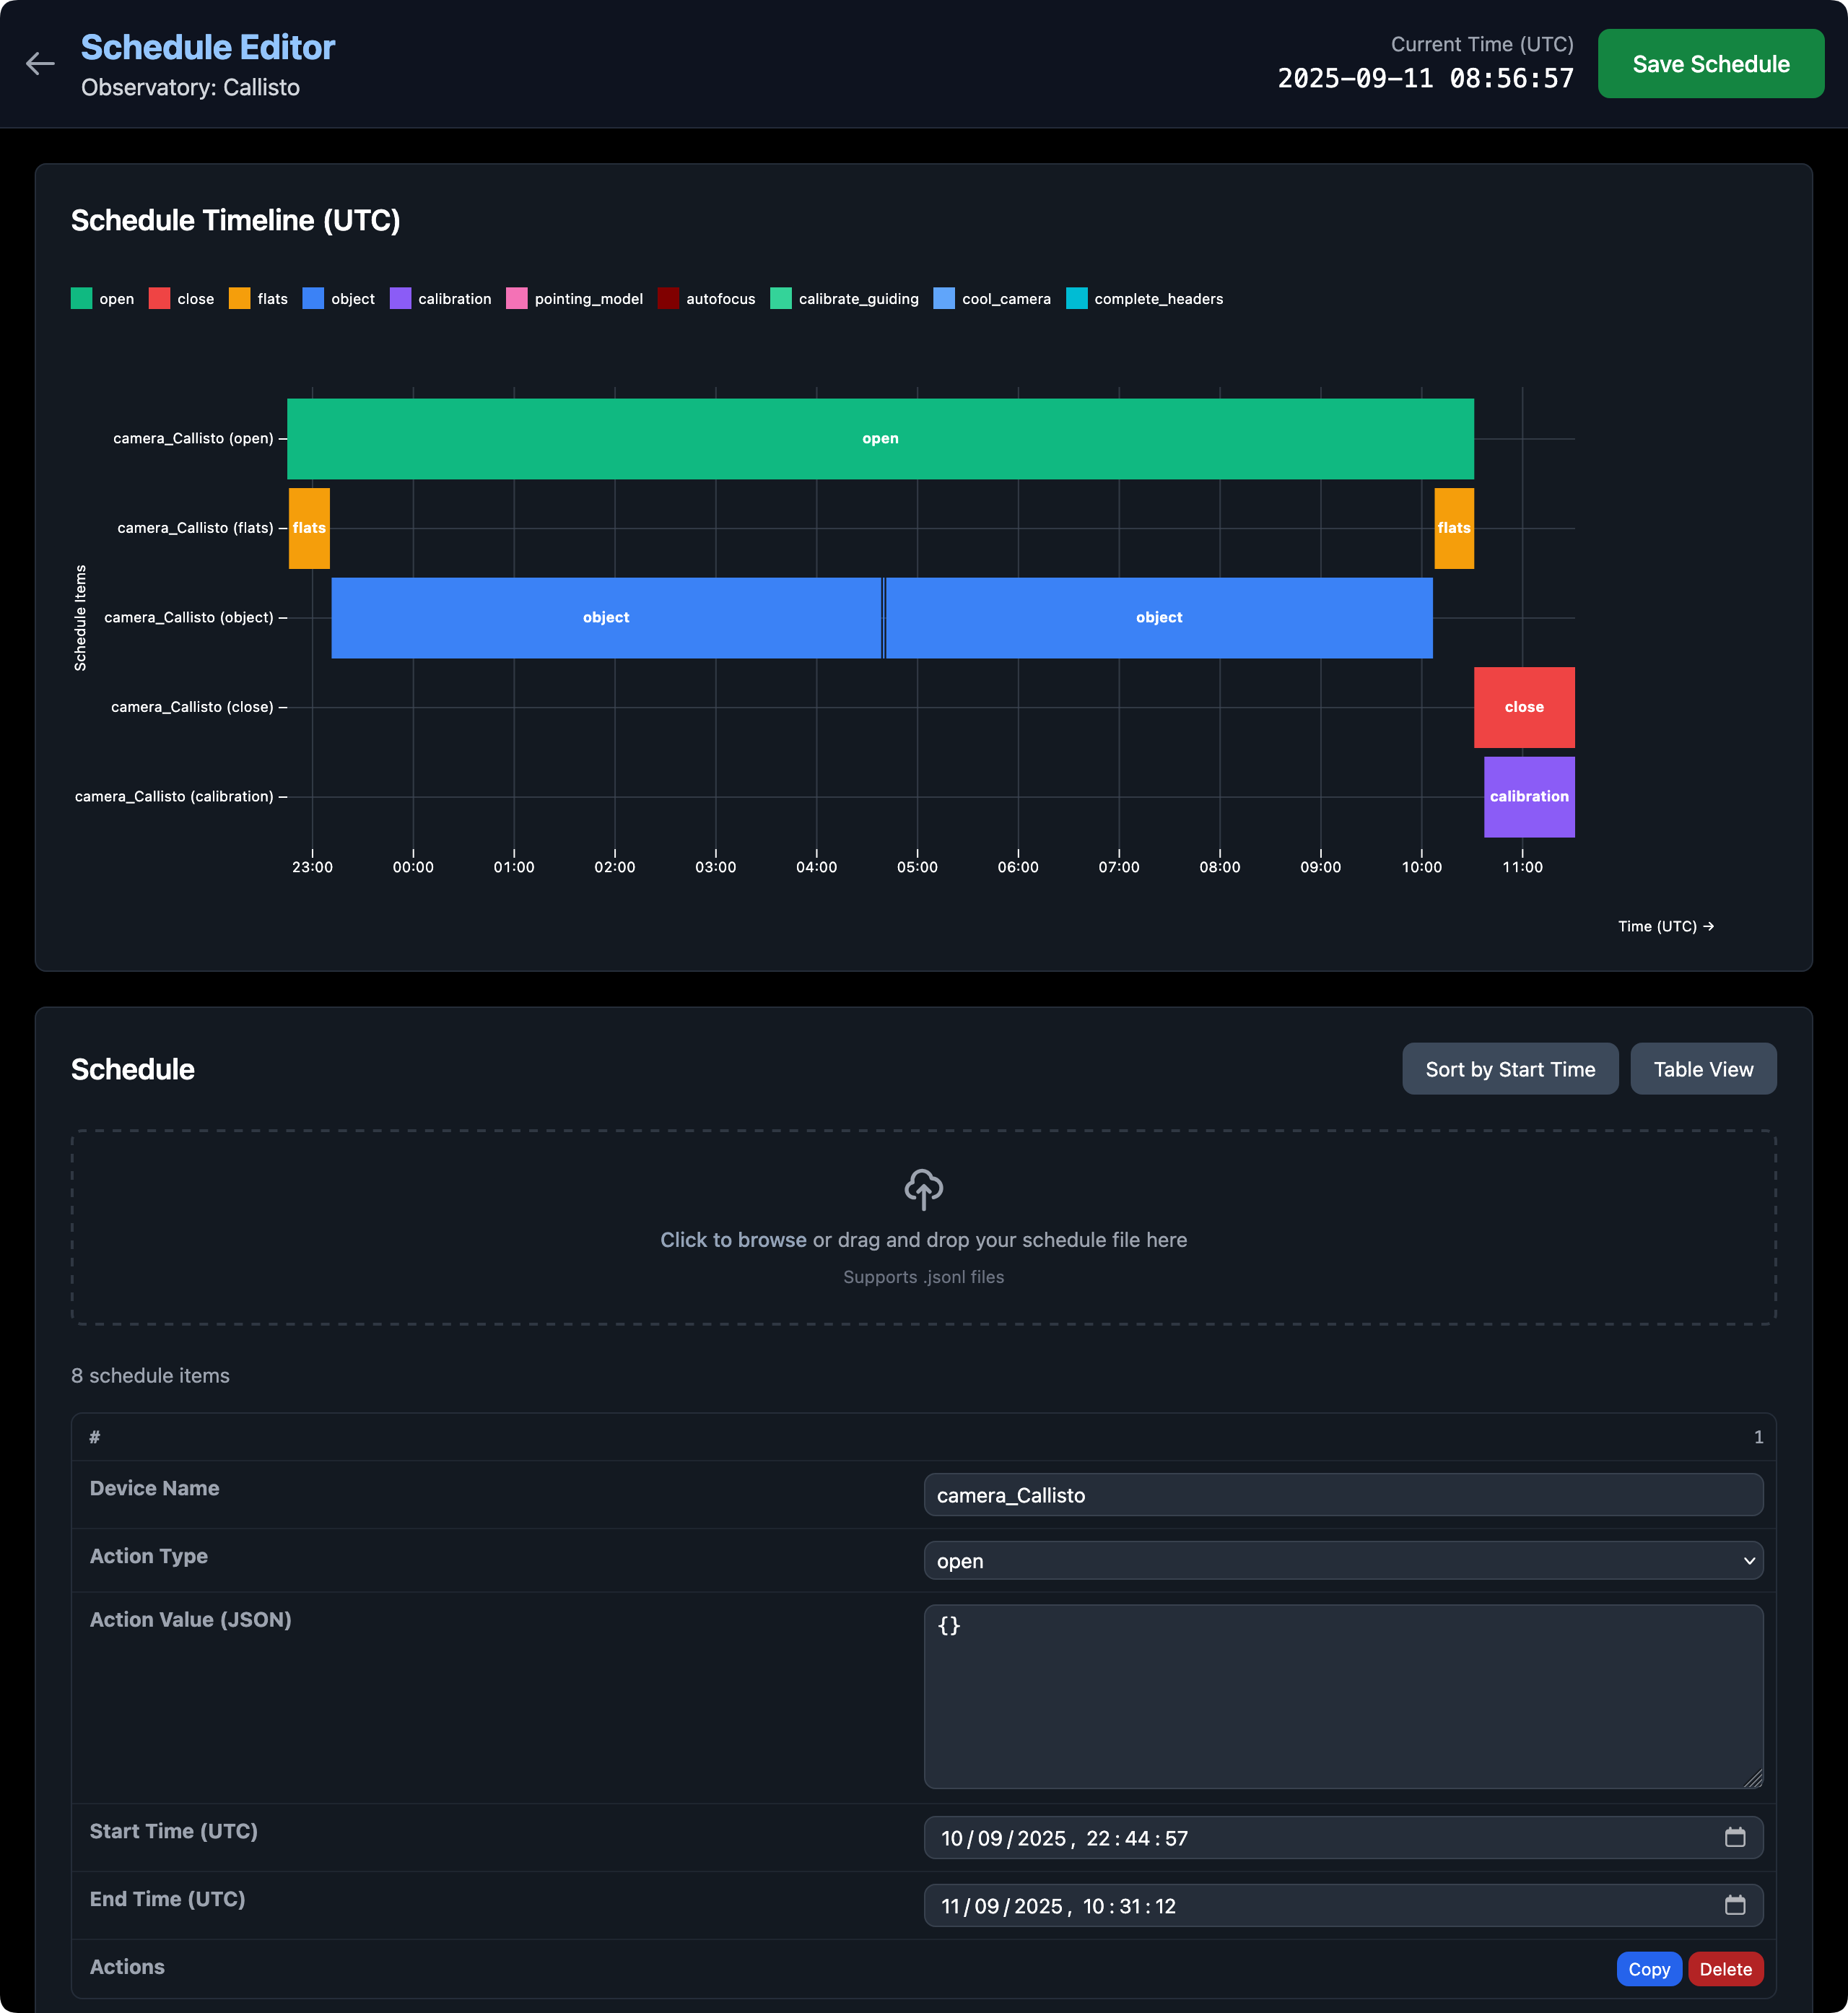
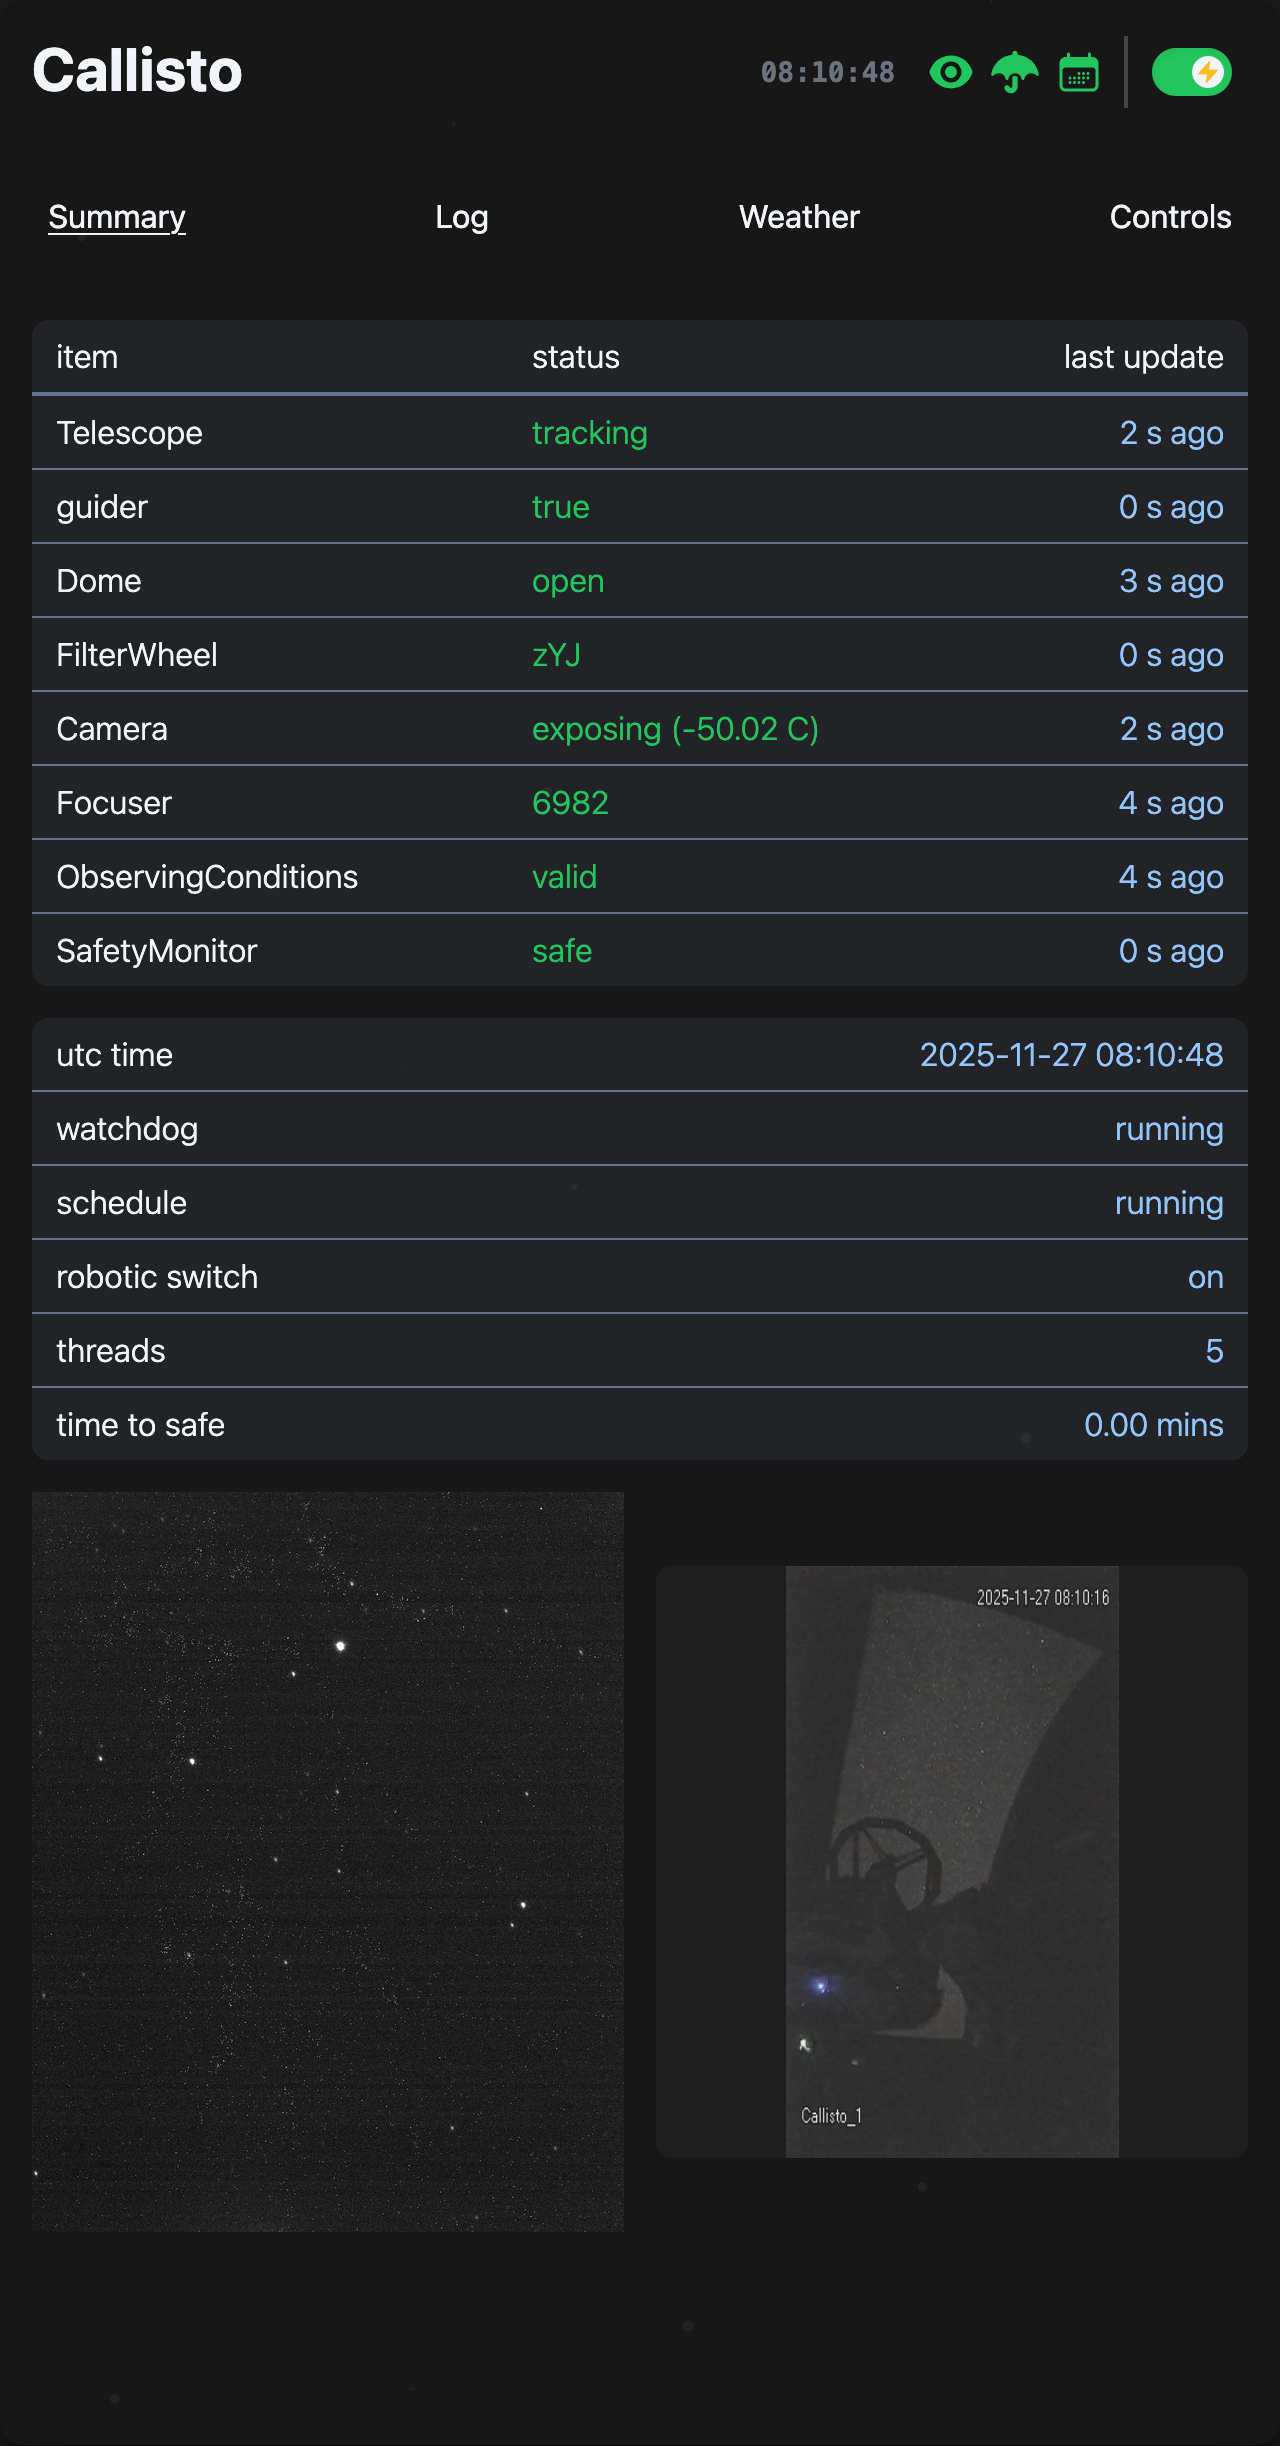
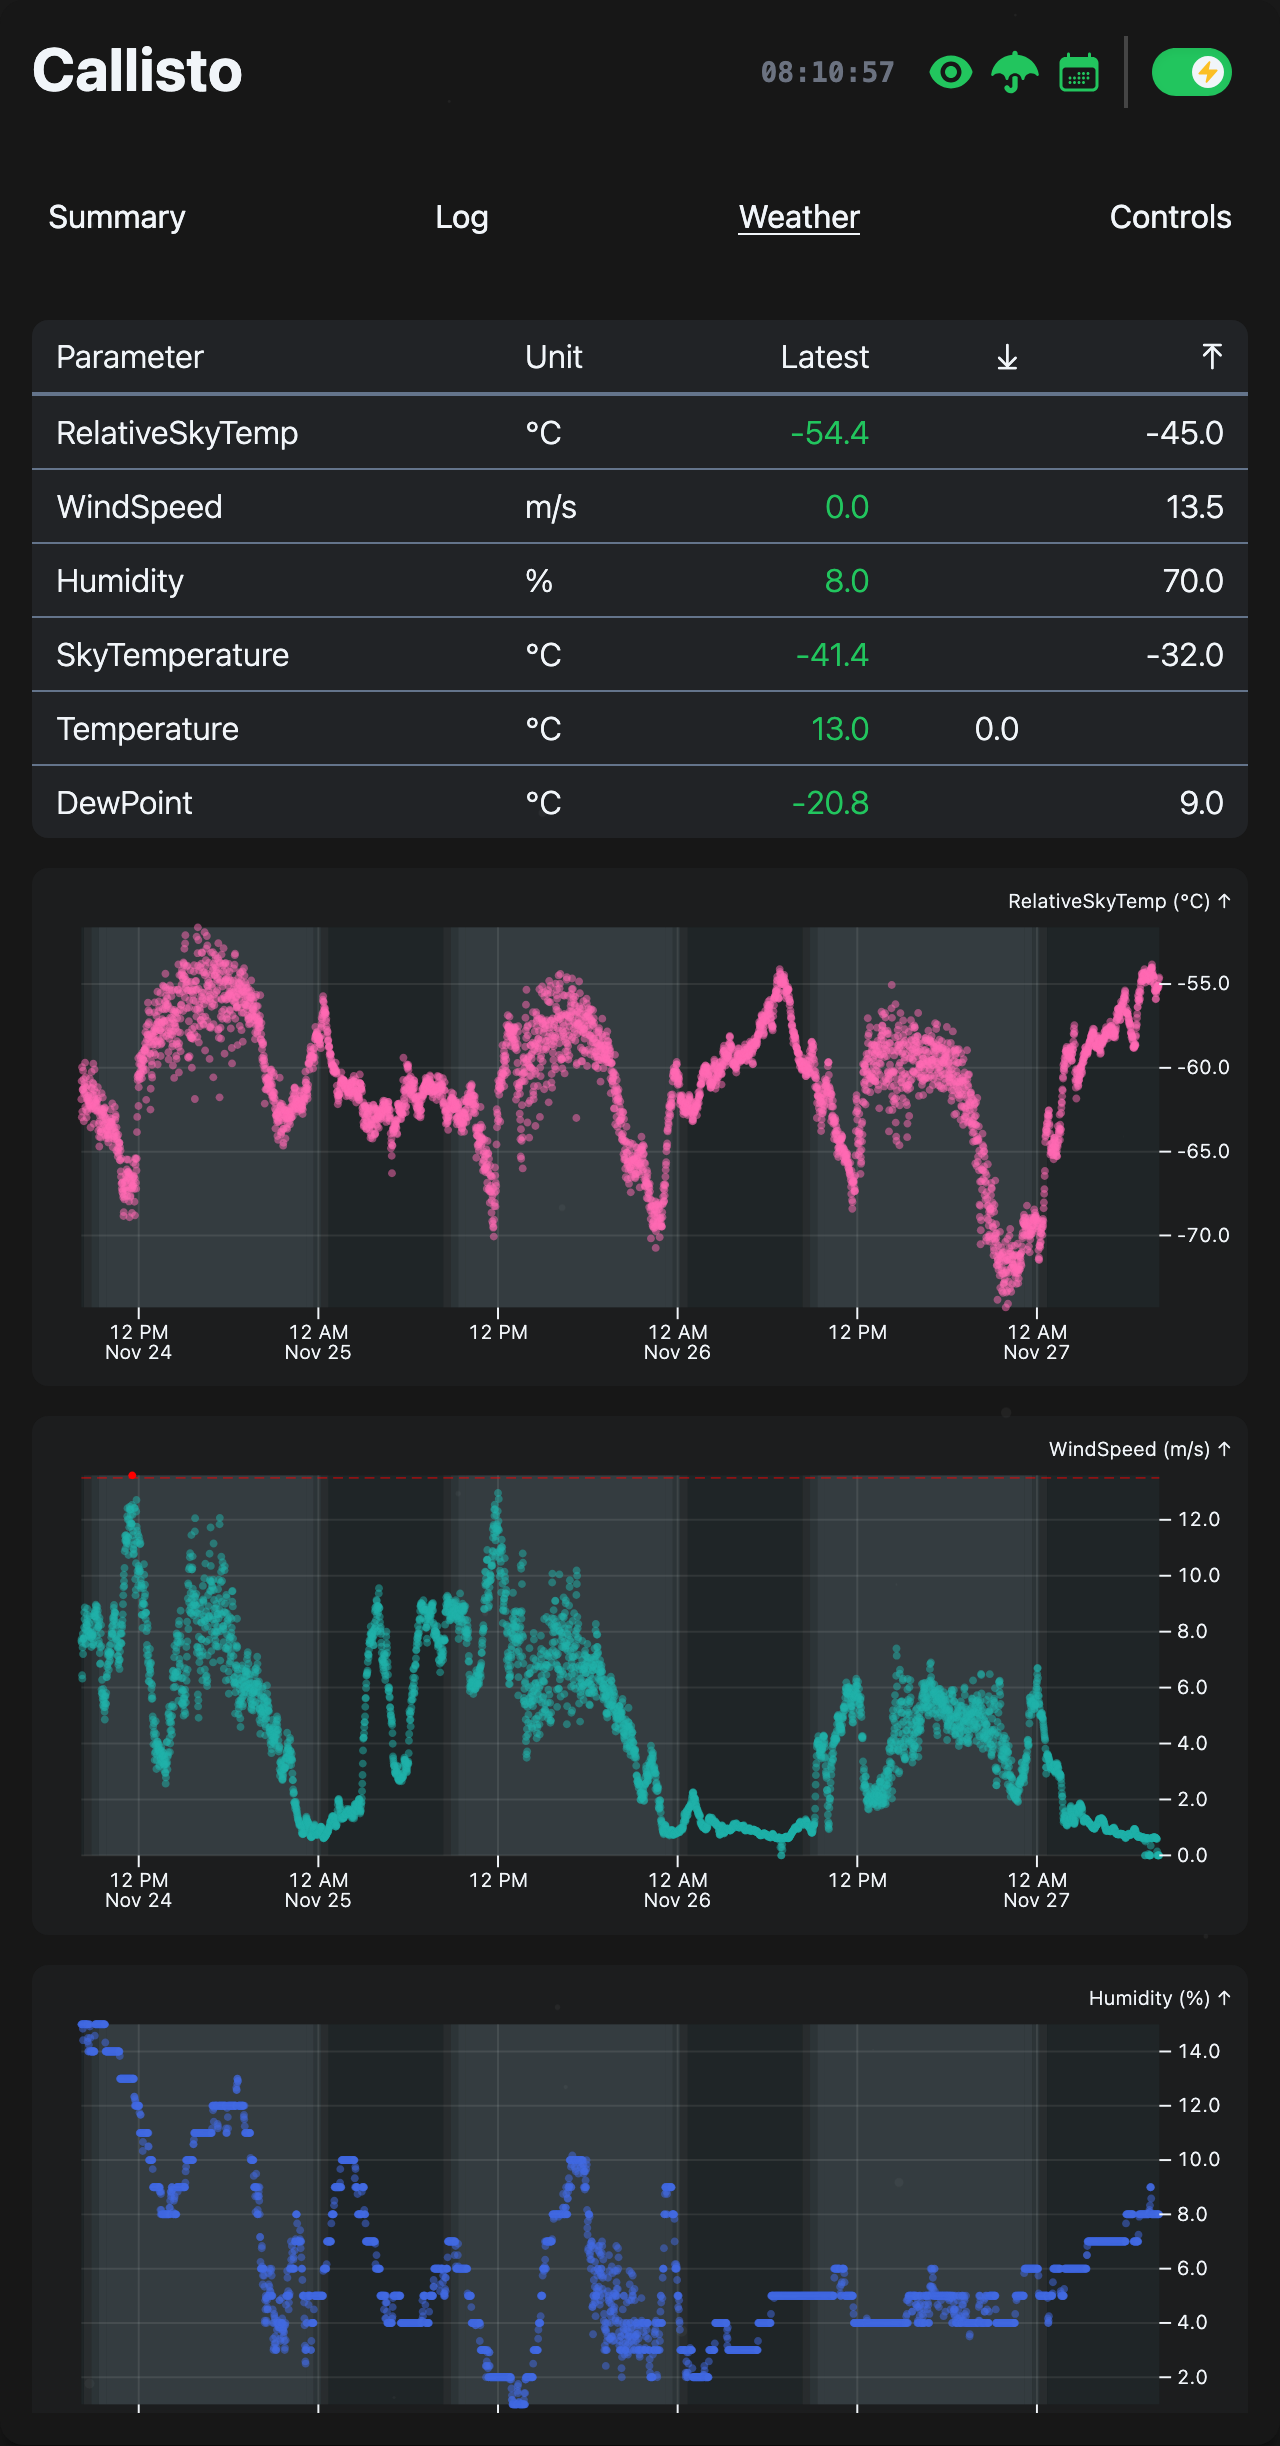
After a few moments, open your web browser and navigate to the following URL http://localhost:8000, and you should see Astra’s web interface.
 |
| 
 |
|